EagleCAD to KiCAD Migration Guide: Tips and Tricks for PCB Designers

Quick Overview:
- Autodesk EagleCAD is no longer available as a standalone PCB CAD tool.
- KiCAD, an open-source option, is great if you're looking to save some money.
- You can transfer your Eagle CAD files to KiCAD, but watch out for a few quirks.
I've been using EagleCAD for 20 years, which is over half of its 36-year run. I've dabbled with it as a hobbyist, maker, DFM blogger, and even as a small robot manufacturer. Nowadays, I dust it off for the occasional hobby project or in my work as a journalist. So, while I know EagleCAD inside and out, I can't really justify spending a lot on a fancy CAD package, whether it's a one-time purchase or a subscription.
So Long, Stand-Alone Eagle
It's a bummer for folks like me, but EagleCAD is on its way out. The last stand-alone version, 9.6.2, was released in May 2020. Now it's bundled with Autodesk Fusion as version 9.7.0. Full support for EagleCAD ends on June 7, 2026.
Until then, I've got a sweet deal with a grandfathered subscription at $100 a year, which is what I used to pay before the subscription model kicked in. When EagleCAD switched to subscriptions in 2016, there was a lot of grumbling online. Personally, I didn’t mind the change—Autodesk did improve the software quite a bit. Businesses have to make money, right? Sure, I'd love to pay less, but that's true for anything, even a hamburger. It all comes down to whether it's worth the cost. For me, the occasional hobby use doesn't justify the $545 per year for the lowest tier of Fusion360, especially since I don't need the extra stuff that comes with it.
What to Do with My EagleCAD Designs
I've got about 200 Eagle .sch/.brd files dating back to 2004. Most of them are probably never going to be used again, but some, like the Arduino-compatible clock I wrote about here on Design News, are still in play and need further development. I don't want to start from scratch with those schematics and layouts.
I tried KiCAD, the open-source PCB CAD tool, about ten years ago and wasn't impressed. But the latest version, 8.02, is a different story—it's a lot better. It has features similar to Eagle, and the user interface feels familiar. It's not a clone, but it seems like the KiCAD developers were inspired by Eagle. Like Eagle, KiCAD couples the schematic and PCB layout, so changes in the schematic update easily in the board editor. The design process feels very similar to using EagleCAD.

Easy Import—But There's More to It
I decided to start with my Arduino-compatible clock design for the conversion. You can find both the KiCAD files and the old Eagle files on my GitHub page.
Tools and files you'll need:
Switching from EagleCAD to KiCAD was a lot easier than I thought it would be. The first thing to do is to check out the many online tutorials and videos about KiCAD. Once you're a bit familiar with it, you can start importing your EagleCAD files.
The import process looks straightforward, but there's a catch when you want to modify the design. The schematic imports smoothly and seems to be complete and unbroken.
Here's how to get started:
Import the Schematic:
- Go to File > Import Non-KiCad Project… > EAGLE Project.
- Choose your EagleCAD ".sch" schematic file. KiCAD will also import the ".brd" board file. For my project, this was "UnoNeoClock V2.2.sch".
- Designate a folder for the KiCAD project.
- KiCAD will show your schematic and a dialog box called “Edit Mapping of Imported Layers.” I had good luck with the “Auto-Match Layers” option, but you might need to tweak things based on how you used layers in Eagle.
Dealing with the PCB Layout:
- In the PCB editor, select the command to “Update PCB from Schematic…”.
- Do NOT click through the default options in the dialog box. If you do, you'll end up with a lot of manual work.
- KiCAD and Eagle don't track object locations the same way, and the schematic symbols and footprints aren't as tightly coupled in KiCAD as they are in Eagle.
- If you use the default settings, you'll see the board layout, but all your parts will be off to the side. The copper layers will be there, but they'll be disconnected from the rat's nest and components.
So, while importing is easy, making modifications can be a bit tricky. Take your time with the mapping and updating steps to save yourself some headaches later.

Fortunately, There's a Fix
Good news—there’s a fix for this! When you open the "Update PCB from Schematic…" dialog, make sure to adjust the check boxes like in the image below. Check the box for "Re-link footprints to schematic symbols…" and uncheck "Replace footprints with those specified…"
Set the dialog options like this:

After you’ve done this and saved your board file, you’ll need to change the check boxes back to the original settings.
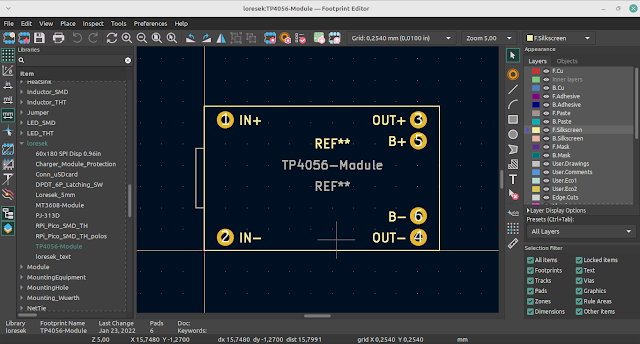
Libraries Operate Differently in KiCAD
Besides my 200 schematic and board designs, I've got a ton of custom libraries made for Eagle. After nearly two decades in electronics manufacturing, I’ve learned that the biggest assembly headaches come from incorrect footprints and unclear bills of materials.
In EagleCAD, picking a schematic symbol automatically brings the footprint with it. But in KiCAD, things work a bit differently. You choose your component symbol in the schematic editor, and then you assign a footprint separately. After that, you head to the board and use the "Update PCB from Schematic…" option, making sure to check the "Replace footprints…" box.
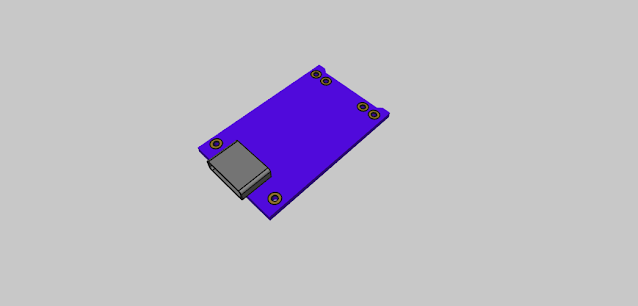
The main goal here, aside from testing out KiCAD, is to swap a USB micro-B connector with a USB type C connector. I followed the process I mentioned, as you can see in the in-progress images below.

Making Room for the New Connector
I moved a few components around to fit the larger connector. The ID resistors for the type C connector are different from those for the micro-B, so I'll need to change those too. I'll also rerun all the design rule checks and probably make a few tweaks here and there. After that, I should be all set.