Dive into the World of Parametric PCB Motors with KiMotor!

Hey there, fellow electronics enthusiasts and DIY fanatics! Have you ever found yourself deep into a PCB design project, wishing you had an easier way to design those intricate motors? Well, today’s your lucky day because I’ve stumbled upon a gem of a tool that’s going to make your life so much easier. Say hello to KiMotor – a nifty KiCad EDA plugin that automates the design of parametric PCB motors. Let's dive into the details and see why this plugin might just be your new best friend in the world of PCB design.
What is KiMotor?
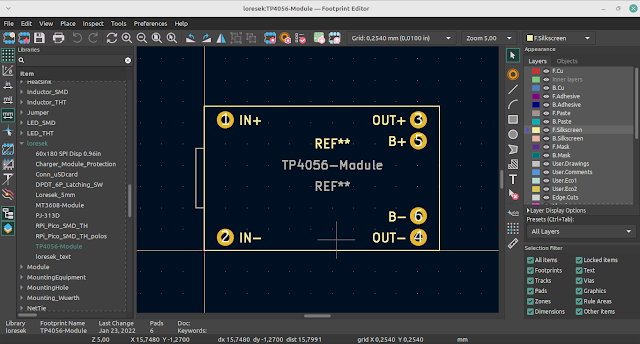
KiMotor is an open-source plugin designed to work with KiCad, the popular Electronic Design Automation (EDA) software. For those who might not be familiar, KiCad is a fantastic tool for designing printed circuit boards (PCBs), and it's beloved by hobbyists and professionals alike. What makes KiMotor special is its ability to automate the design of parametric PCB motors, which can be quite a task if done manually.
Why Should You Care About Parametric PCB Motors?
Before we get too deep into the plugin itself, let's talk about parametric PCB motors. These are motors whose designs are defined by parameters. This means you can adjust things like size, shape, and other characteristics simply by changing a few values. This parametric approach is a game-changer because it allows for greater flexibility and customization in motor design. Whether you're working on a small hobby project or a more complex design, being able to tweak these parameters can save you a ton of time and hassle.
Getting Started with KiMotor
One of the best things about KiMotor is how user-friendly it is. Here’s a quick rundown on how to get started:
Installation: First things first, you’ll need to download and install the plugin. Head over to the KiMotor GitHub page and grab the latest release. The installation process is straightforward, and there are detailed instructions available to guide you through it.
Integration with KiCad: Once you have the plugin installed, integrating it with KiCad is a breeze. Simply follow the steps provided in the documentation to add KiMotor to your KiCad setup. It’s as simple as copying a few files and adjusting some settings.
Designing Your Motor: With KiMotor up and running, you can start designing your parametric PCB motor. The plugin provides a user-friendly interface where you can input your desired parameters. Want a larger motor? No problem, just adjust the size parameter. Need different coil configurations? You got it. The plugin handles all the heavy lifting, generating the necessary designs and layouts for you.
Features That Make KiMotor Shine
Now, let’s get into the nitty-gritty of what makes KiMotor such a powerful tool:
Parametric Design: As mentioned earlier, the ability to define motors by parameters is a huge plus. This feature allows for rapid prototyping and customization, making it easy to experiment with different designs.
Automated Layouts: KiMotor automatically generates the PCB layout based on your parameters. This means you don’t have to manually place and route components, saving you a ton of time and effort.
Versatility: Whether you’re designing a simple motor for a small project or a more complex one for a larger application, KiMotor has you covered. The plugin supports a wide range of motor types and configurations.
Open Source: Being open-source means that KiMotor is free to use and can be modified to fit your specific needs. If you’re a developer, you can even contribute to the project and help make it better for everyone.
Community Support: One of the great things about open-source projects is the community that comes with them. There’s a growing community of KiMotor users and developers who can offer support, share tips, and help troubleshoot any issues you might encounter.
Practical Applications

So, what can you do with KiMotor? The possibilities are endless! Here are a few ideas to get your creative juices flowing:
DIY Projects: If you’re into DIY electronics, KiMotor can help you design custom motors for your projects. Whether it’s a small robot, a custom fan, or any other gadget, you’ll have the perfect motor for the job.
Educational Use: Teachers and students can use KiMotor as a learning tool. It’s a great way to teach and learn about PCB design, motor construction, and the principles of parametric design.
Professional Prototyping: For professionals, KiMotor can speed up the prototyping process. Quickly design and test different motor configurations to find the optimal solution for your application.
Tips and Tricks
To make the most out of KiMotor, here are a few tips and tricks:
Experiment with Parameters: Don’t be afraid to play around with the parameters. The more you experiment, the better you’ll understand how each parameter affects the motor design.
Join the Community: Get involved with the KiMotor community. Share your designs, ask for feedback, and learn from others. There’s a wealth of knowledge out there just waiting to be tapped into.
Keep Updated: Make sure you keep your KiMotor plugin updated. The developers are constantly working on improvements and new features, so staying up-to-date ensures you have the best tools at your disposal.
Final Thoughts
KiMotor is a fantastic tool that brings a lot of power and flexibility to PCB motor design. Whether you’re a hobbyist, a student, or a professional, this plugin has something to offer. Its parametric design capabilities, ease of use, and robust feature set make it a must-have for anyone involved in PCB design.
Ready to give it a try? Head over to the KiMotor GitHub page to download the plugin and start designing your own parametric PCB motors today. Happy designing!
And there you have it, folks! A deep dive into the wonderful world of KiMotor. If you have any questions, tips, or experiences with KiMotor, feel free to share them in the comments. Until next time, keep tinkering and happy designing!